Composing a new email
New messages can be created from
(i) the Contacts record by double clicking on the Email address field
(ii) from an Alternative Email address by using the send email command or
(iii) invoking the New command (F3 or Alt+N) from the Main Messaging screen. If a linked message is selected in the Main Messaging screen you are prompted to add the linked contact as a recipient.
No matter how it was invoked you are presented with a blank email to fill in.
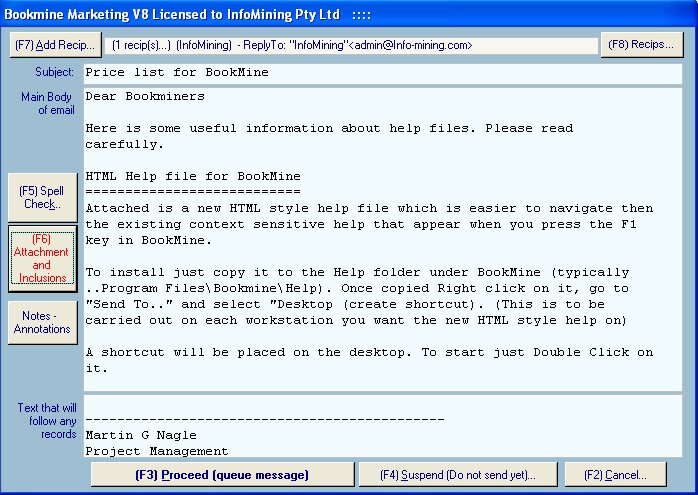
Recipients - When presented with the blank email you can add one or more recipients using the (F7) ADD RECIP.. button. You are presented with options for choosing distribution lists, single or multiple recipients and send options such as recipient type. The ype can be To, CC or Bcc. Adding as a Bcc recipient hides that recipientĺs email address in the email received by all other recipients. Specifying CC send a carbon copy to the recipient.
Adding Distribution Lists to Recipients of messages - Members of distribution lists are automatically added as Bcc (Blind carbon copies) recipients to protect your valuable addresses. When you add a Distribution list as the recipient all members of the list are added as Bcc recipients. Their email addresses are checked for validity and you are given the opportunity to correct any that are invalid. If you do not correct them the corresponding contact is not added as a recipient.
Subject Line - You should enter a descriptive Subject line in all emails you send. As well as being good Netiquette it will be invaluable in future as a handle to recognise the message. Double Click to insert standard subject lines (created already by you to handle typical recurring situations).
Attachments and Inclusions
You can add one or more attachments using the (F6) Attachments and Inclusions command. You are presented with the attachments interface. You can add entire Catalogues, views of Stock records or files of any type located on loocal or remote disks in this way. Click the required button to add the required records, catalogue or disk file as follows.
To add Stock Records from Bookmine as an attachment:
Output formats - Select an output template to use. This specifies where the records will be taken from, how they will be presented, whether the output is in text or Word format etc, how they will be sorted, which fields will be included and the order in which they will appear. If you wish the records to be included as text in the body of the message you must ensure that the Destination specified in the format you select is ôText file on diskö. Otherwise all records are sent as MIME attachments. If the size of the text to be included in the message body is very large it will be sent as an attachments. Text inclusions are always added to the end of the pre message field in the body of the email.
You can preview the Output format you select using the Preview Format button. You should do this at least once to confirm that the format name actually corresponds to the options selected in that format. For example a format called ôStock View to Textö may have its Destination set to ôWord Documentö because someone has changed it since it was set up and named or may have its source set to Catalogue/List. A summary is displayed when you select a format. You should check this.
Catalogues as Inclusions/Attachments- Select an output format that has Catalogue /List specified as the source of the records. Preview the format if in doubt. Select the catalogue or list you wish to send with the email from the drop down list.
Current View on the Stock form - Select an output format that has Current View on Stock Form specified as the source of the records. Be sure that the desired view is currently selected on the Stock form. If not sure suspend the message and select the required view before proceeding. Note: If the view has all records in your Stock this will be a very large attachment.
Adding files from disk - You can also add files of any type as an attachment using the Add a File command. They are automatically encoded in Base64.
Body Text: Fill in the Pre Message and Post message text fields as required. These make up the body of the email. To speed up composition of messages you can invoke Glossaries by double clicking in either of these fields to insert text which you have already composed to handle recurring situations.
Glossaries: avoid having to type the same paragraphs again and again by setting up glossaries of text that can be inserted into outgoing messages (these are also available in Contacts, Stock and other modules). Compose a well considered standard reply once and have all members of your organistation use it again and again. This not only saves time and also enables you to specify how recurring situations should be responded to and avoids spelling and syntax mistakes due to inattention.
Glossaries are invoked by Double Clicking or pressing the Ctrl + / keys together followed by the first few letters of the named glossary. If a matching glossary is found pressing the enter key will insert the glossary text at the cursor position. Double clicking when the cursor is in any text field will also achieve this.
You can create new glossary by entering a name which does not already exist when glossaries are invoked. Glossaries are grouped into types for convenience but any type can be used anywhere in InfoMine when entering data.